What Is An OpenSwitch Appliance?
The appliance is a virtual machine image (in OVA format) that could be run on VirtualBox or VMware (on this article I will focus on VirtualBox) and provides a software datapath (based in OVS right now, but P4 support it’s landing soon). All the rest of the OpenSwitch stack is the same that you will see in a real hardware, and obviously, the software datapath has certain limitations and features not implemented.
Despite his limitations, the appliance is a really nice way to get your hands into OpenSwitch without having real hardware.
If you are using the development environment, you can find the appliance .ova file on the images directory after completing the build, but otherwise, you can also download a periodic image from the project archives (keep in mind this is a developer snapshot, so things may be broken or uncomplete sometimes).
The Appliance has currently 8 network ports (this is the max number of interfaces supported by VirtualBox): eth1 to eth7. The port ‘eth0’ will be the management port, and the other ones are ‘front ports’.
How To Use The Appliance?
The first good for use the appliance is that you can import it into VirtualBox, and by using ‘bridged’ interface with a dedicated NIC (for example an USB ethernet dongle), you can make the appliance talk with a real piece of hardware, like a traditional router. This allows you to play with LLDP, BGP, OSPF, etc. I won’t go into details of a setup like this for this article and is left as an exercise to the reader.
In the previous scenario, using one Appliance was nice, but how about using multiple appliances together? Like creating a virtual CLOS? For that, we will be using GNS3.
If you never heard of GNS3 before, is an Open Source platform to create virtual networks and deployments inside your laptop, with some nice UI. Even more useful, it’s cross platform. I will be focusing my demo here on using it over Mac but should be easy to extrapolate if you are a Windows user.
Installing OpenSwitch virtual appliance on VirtualBox
You can use an OpenSwitch virtual appliance to demo the control-plane features of OpenSwitch. While it is possible to obtain networking information through an OVA file, it is beyond the scope of this manual to configure the required network driver.
- After you have selected a stable OpenSwitch image. use periodic_appliance and locate 0.4.0+<YYYYMMDDHH>/appliance/openswitch-appliance-image-appliance-0.4.0+<YYYYMMDDHH>.ova file.
- On the VirtualBox, click File > Import Appliance and select the OVA file that was downloaded as part of the previous step.
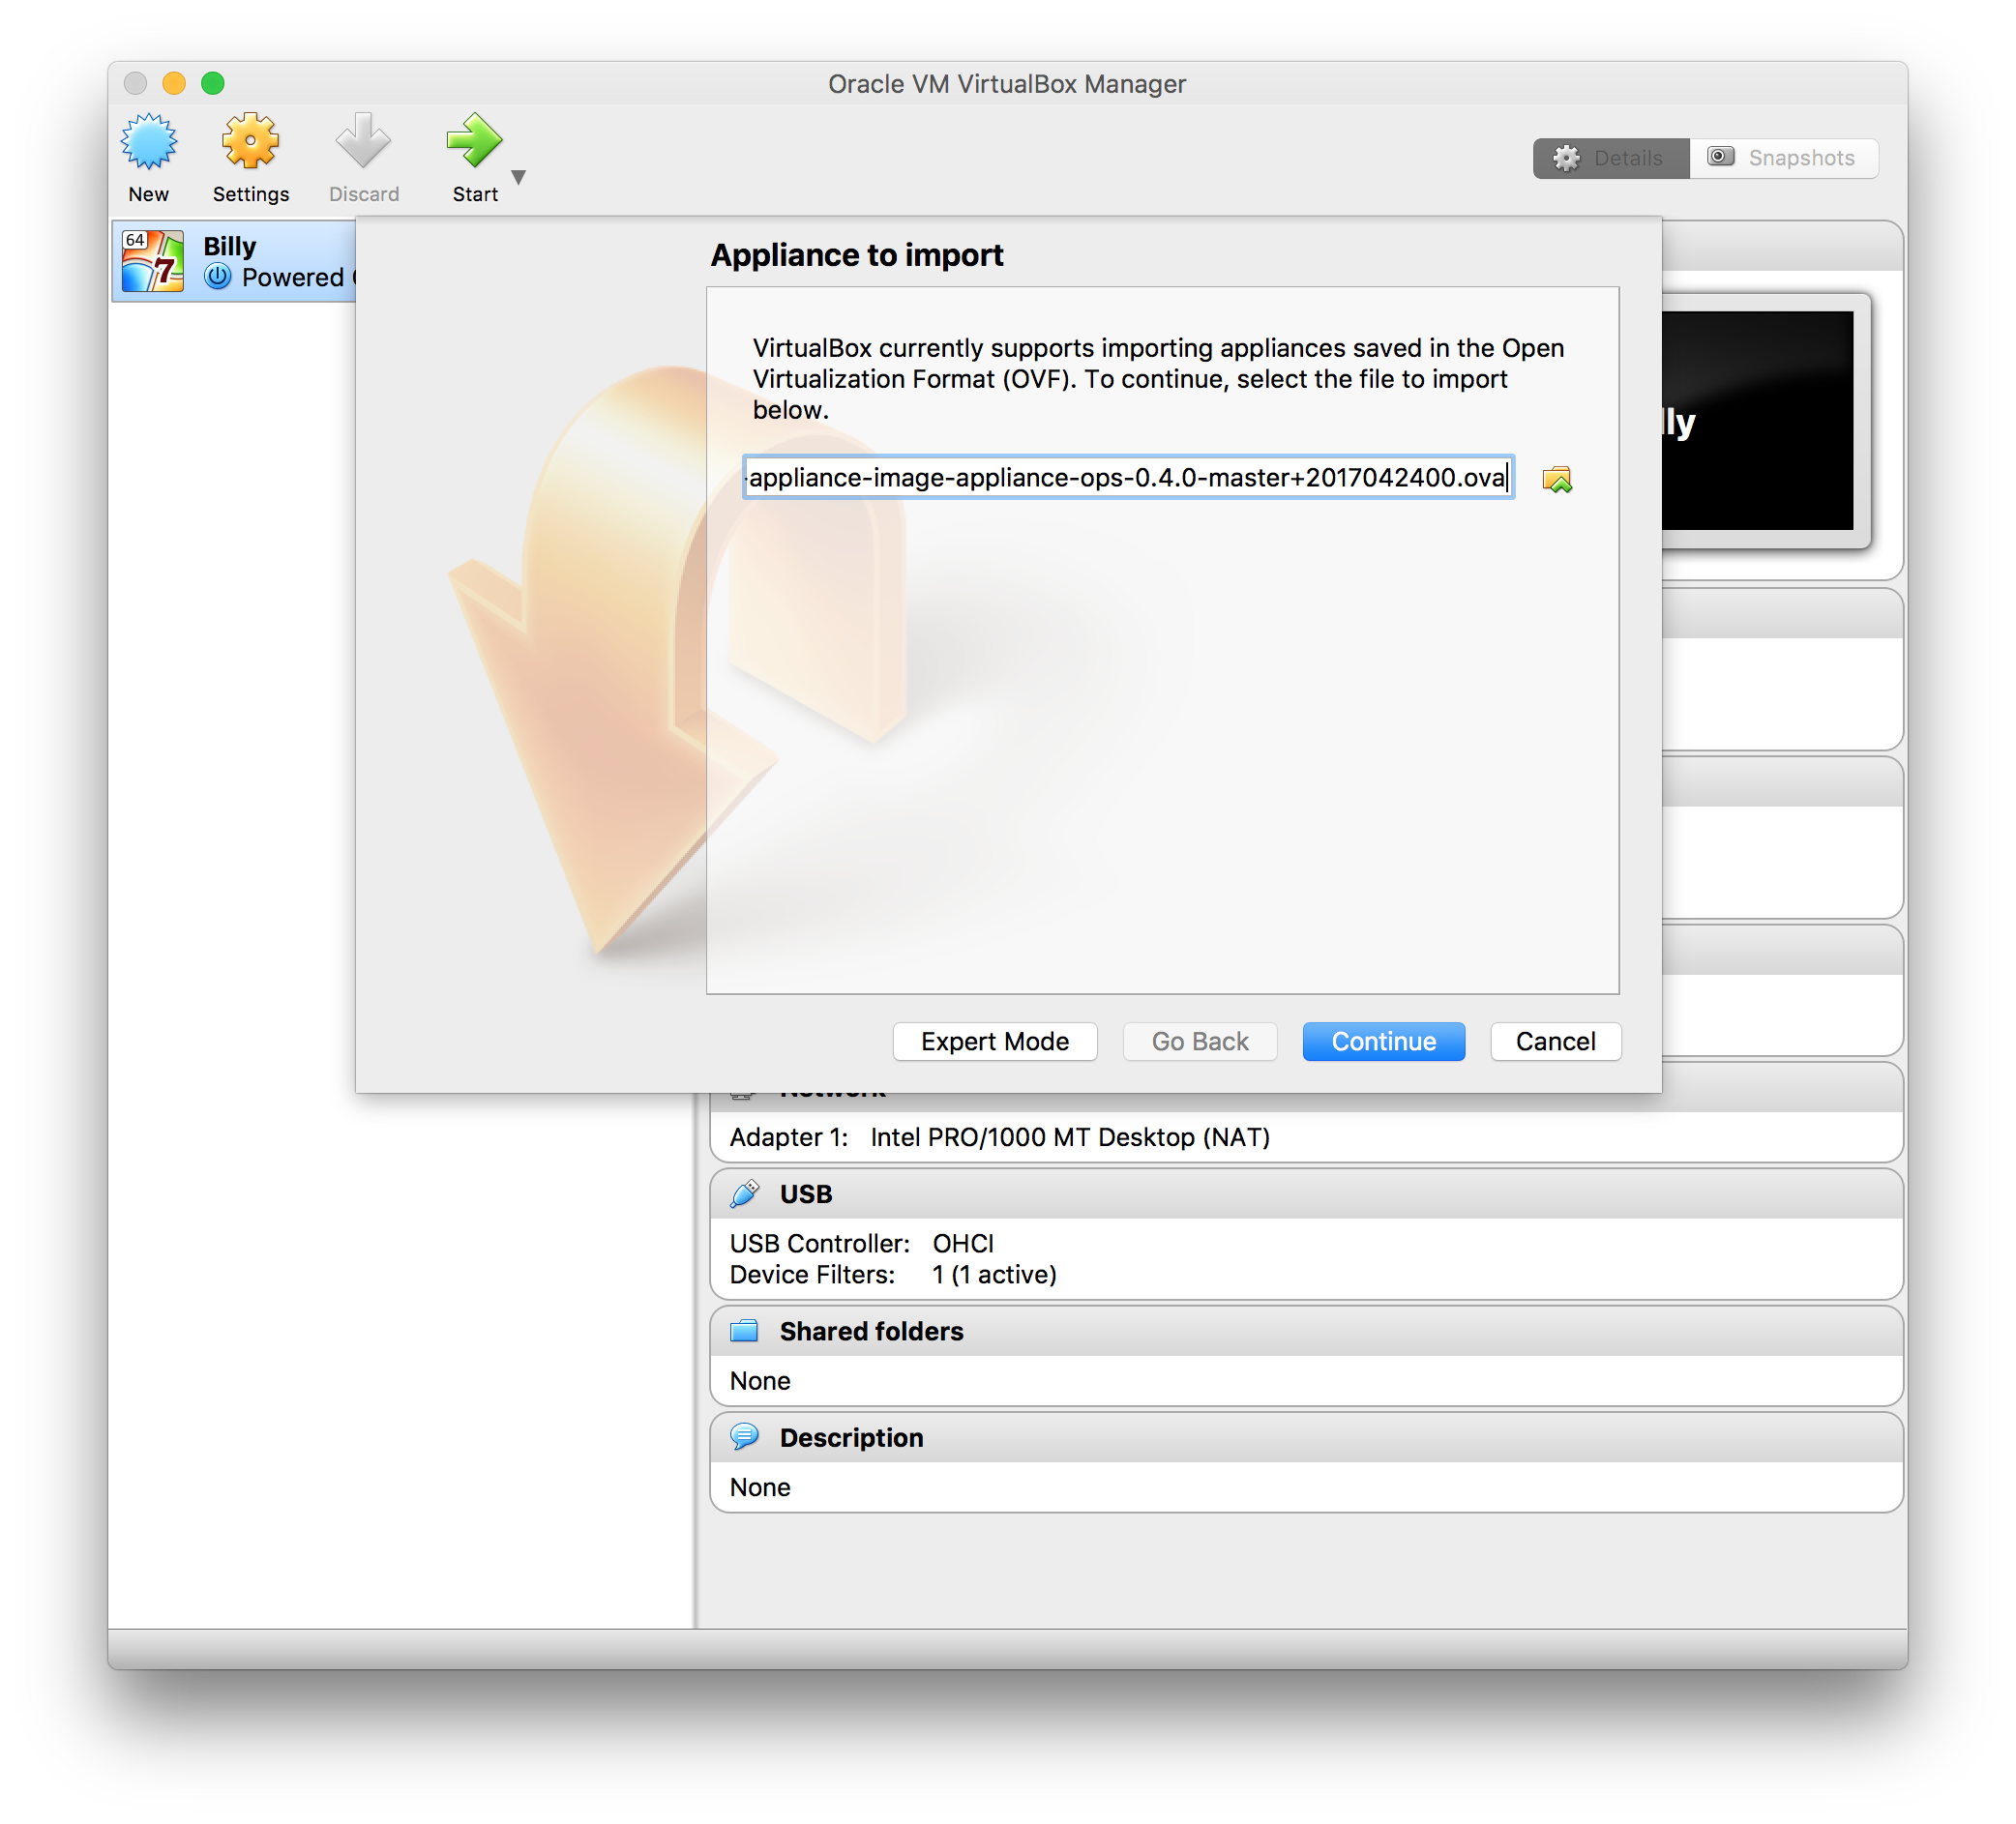
- Click Continue and then Import. This action completes the importing of an OVA file into your VirtualBox.
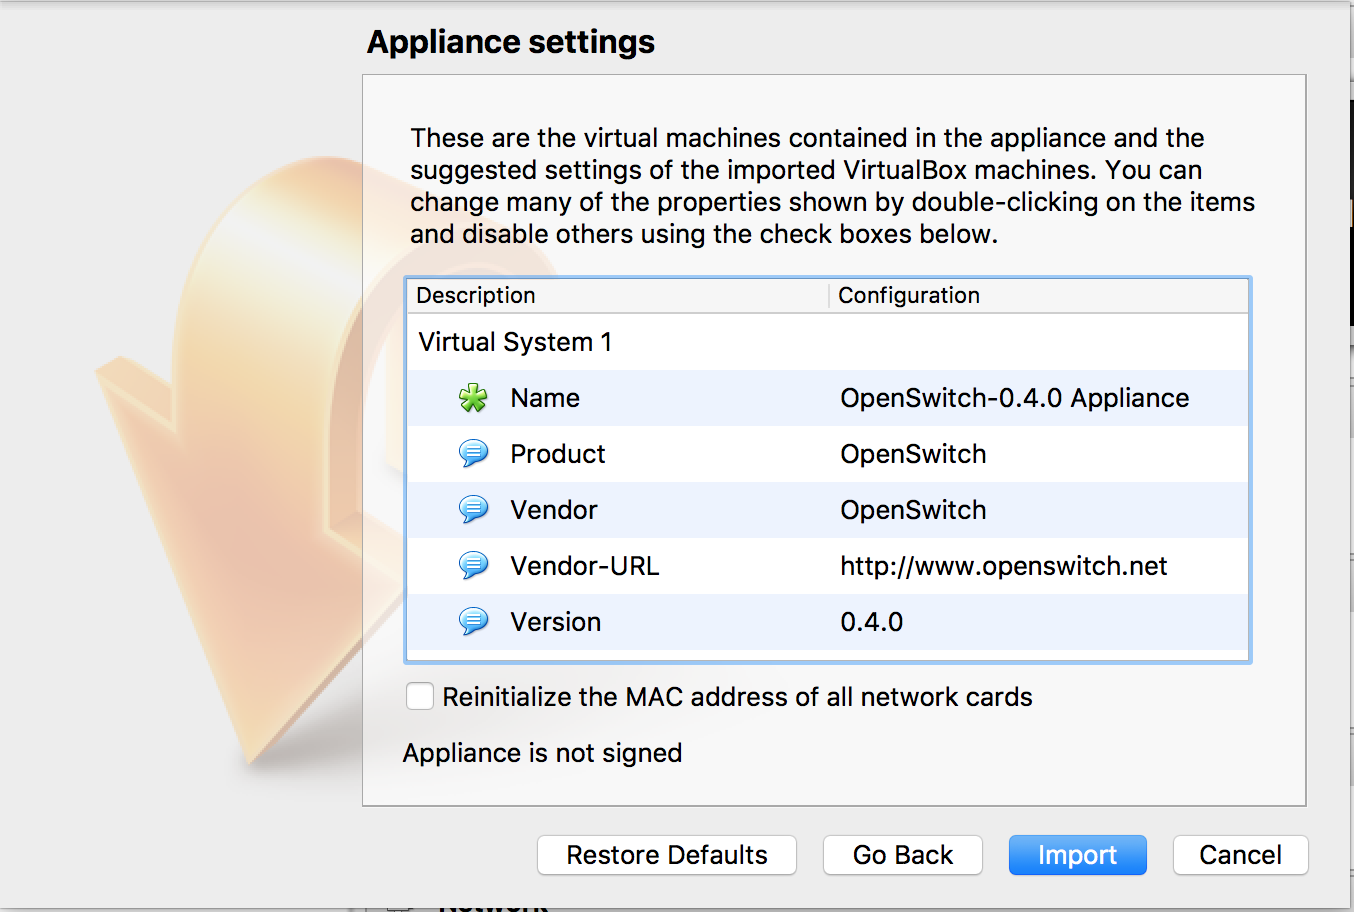
- Click the VM instance you have just imported, such as “OpenSwitch-0.4.0 Appliance”.
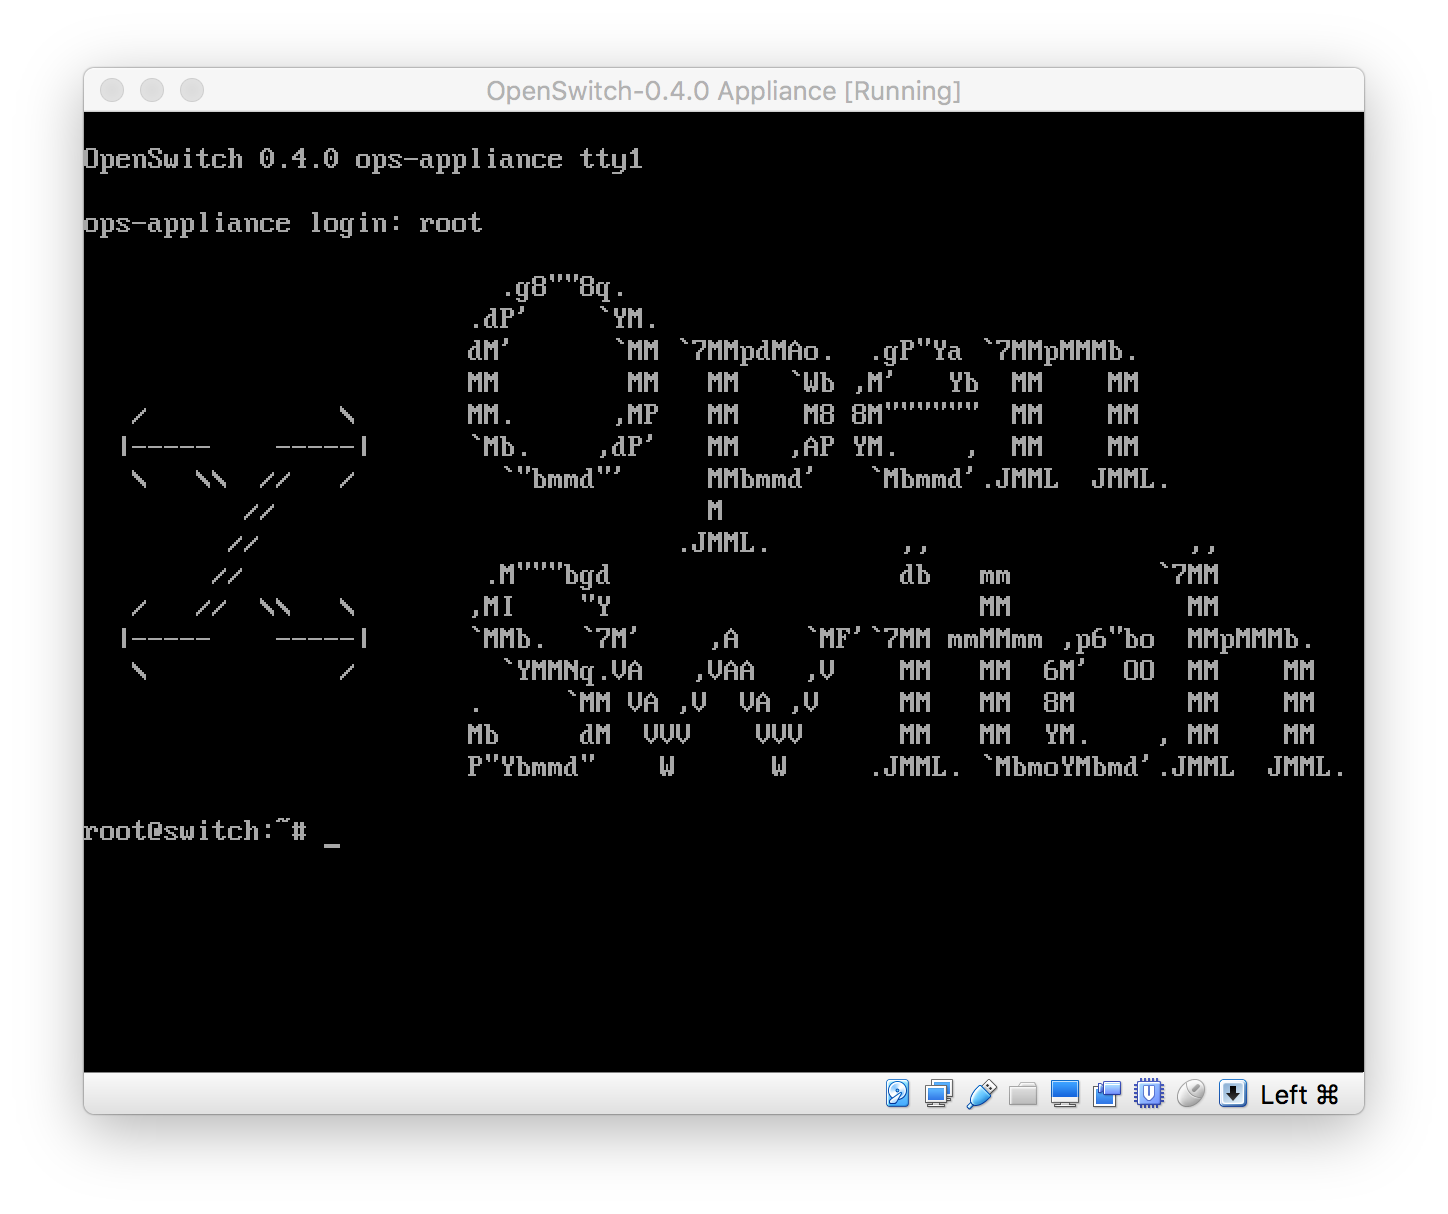
- Click Start > Normal Start. This action opens a GUI window displaying the OpenSwitch instance booting up and launching.
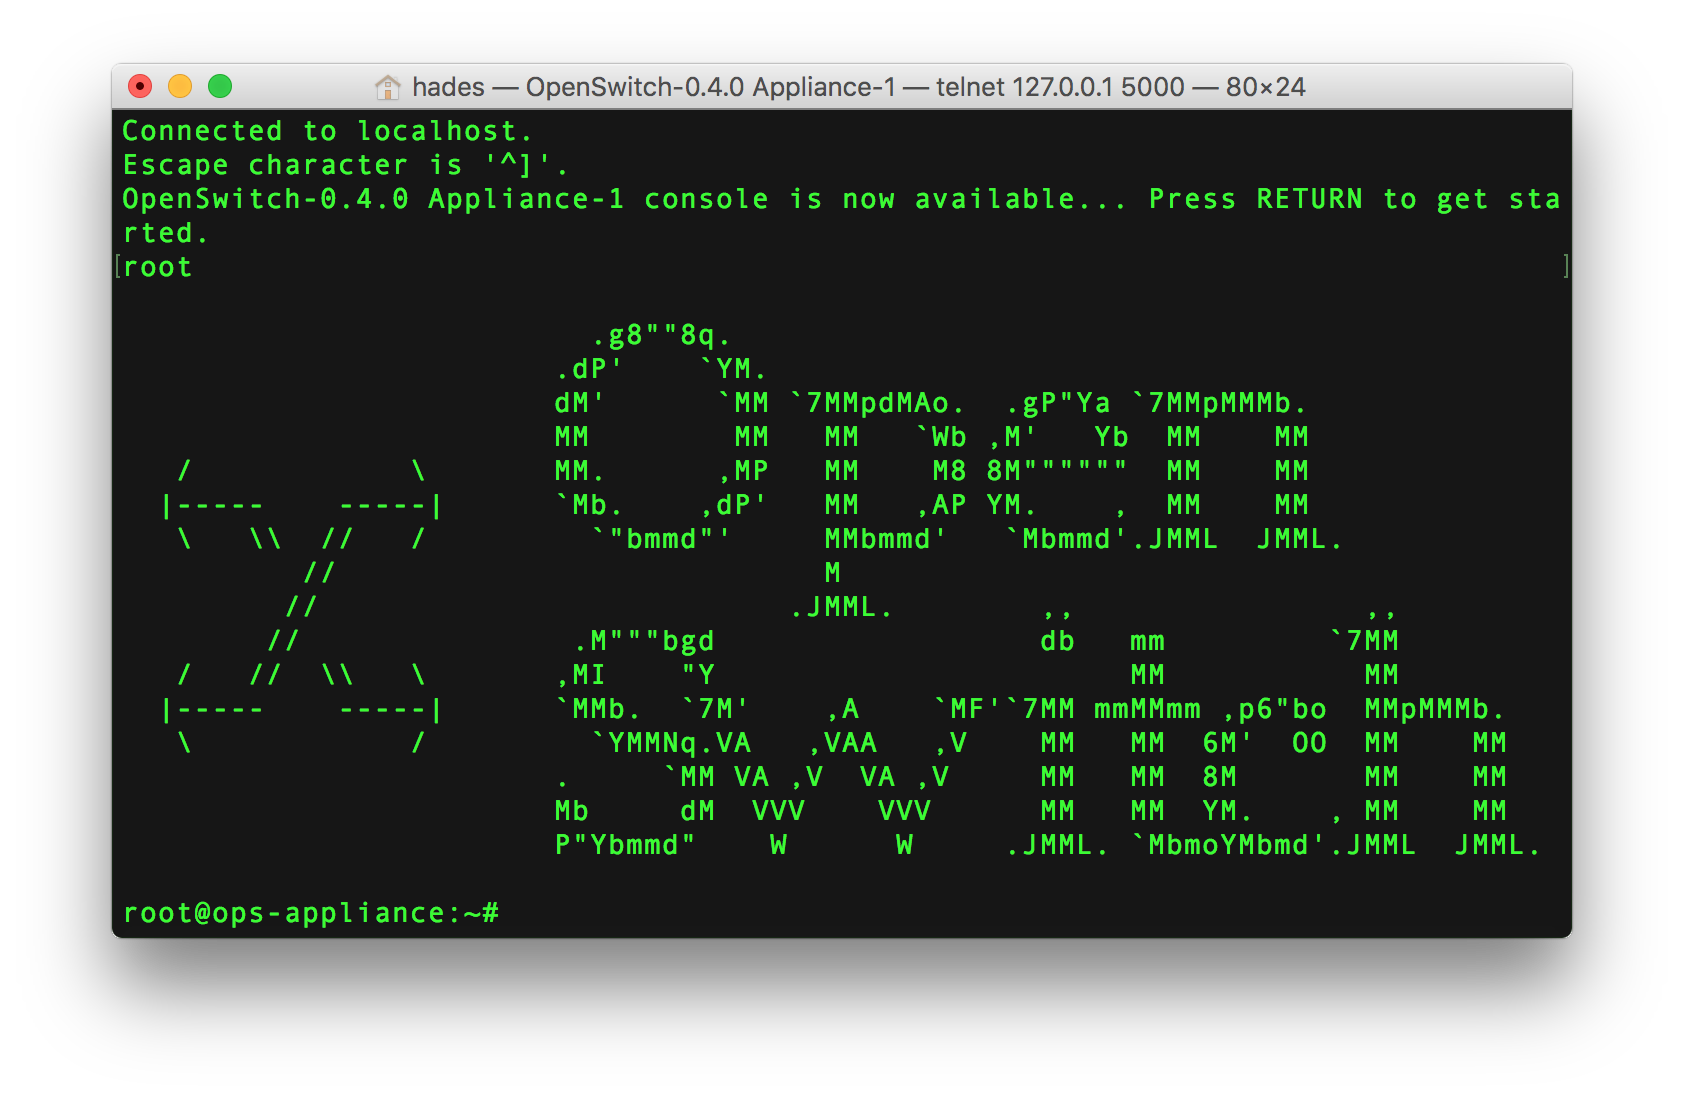
- Once the OpenSwitch instance has launched, the instance shows you a prompt switch login:
Please enter 'root' and you should be able to see a bash prompt.
- Enter
vtyshand the switch should take you to the switch prompt. Here you can access all the privilege mode commands, in addition to being able to issue theshowcommands. - Enter
configure terminal. You are in the configuration mode where you can try out different configurations, such as configuring OSPF/BGP/NTP. The user guides for the different features can be found here. - Obtain the IP address for the switch by entering an
ifconfigcommand at the Bash prompt and finding the IP Addresses used on eth0 interface. - Log in to the web UI by using the IP address obtained from step 9. Open a browser and type the IP address and press enter. Fore more details, click here for accessing the web UI. Log in to the web UI by providing
rootfor the username and no password. - To add a password, click root at the bottom of the left pane, and select Change Password. Then, provide a new password and click Change.
Installing And Configuring GNS3
First, download GNS3 from their project page and install it (yes, you have to register). Next, I recommend that you install Wireshark to have the capabilities of snooping on the traffic of the virtual network.
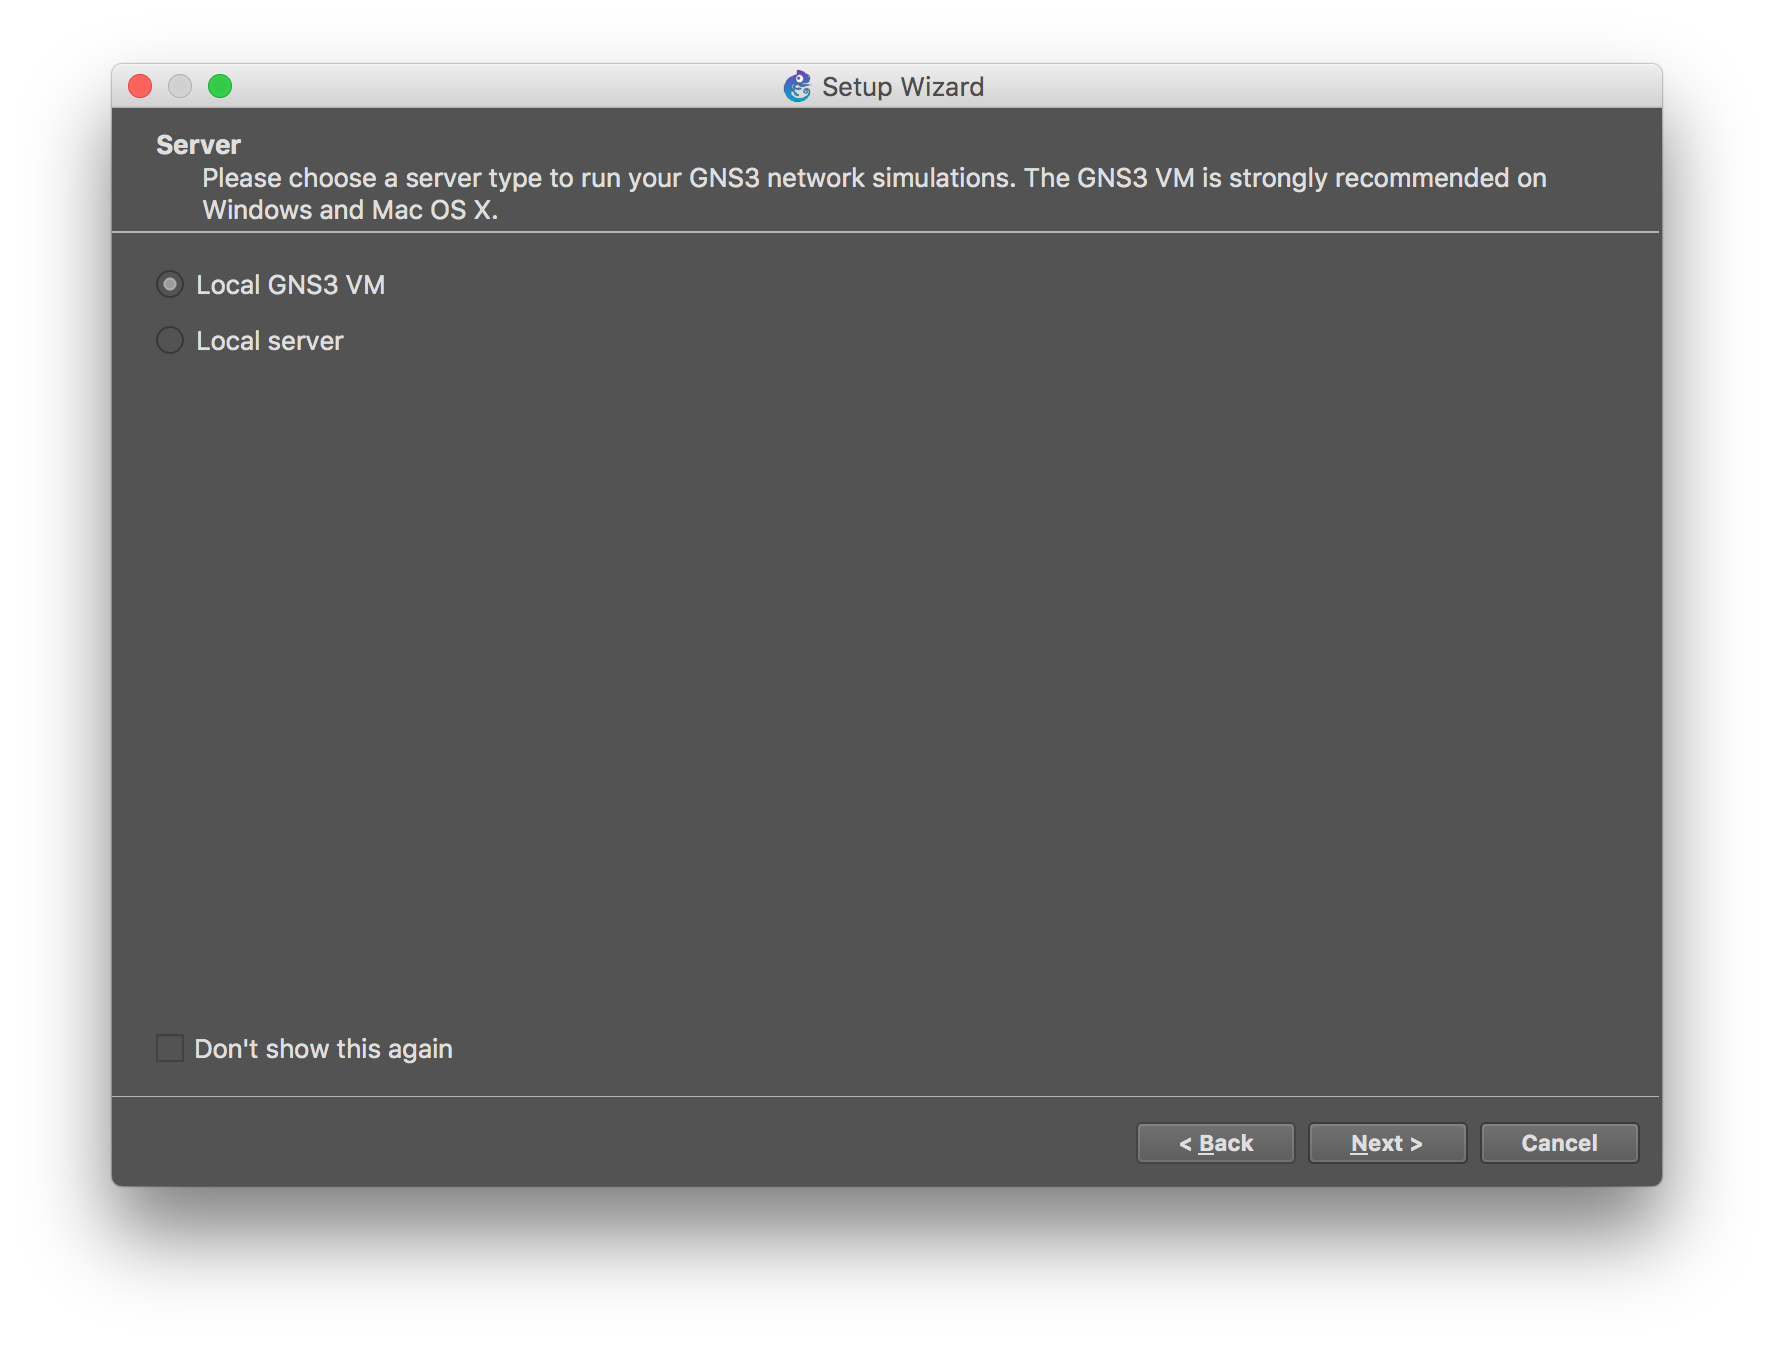
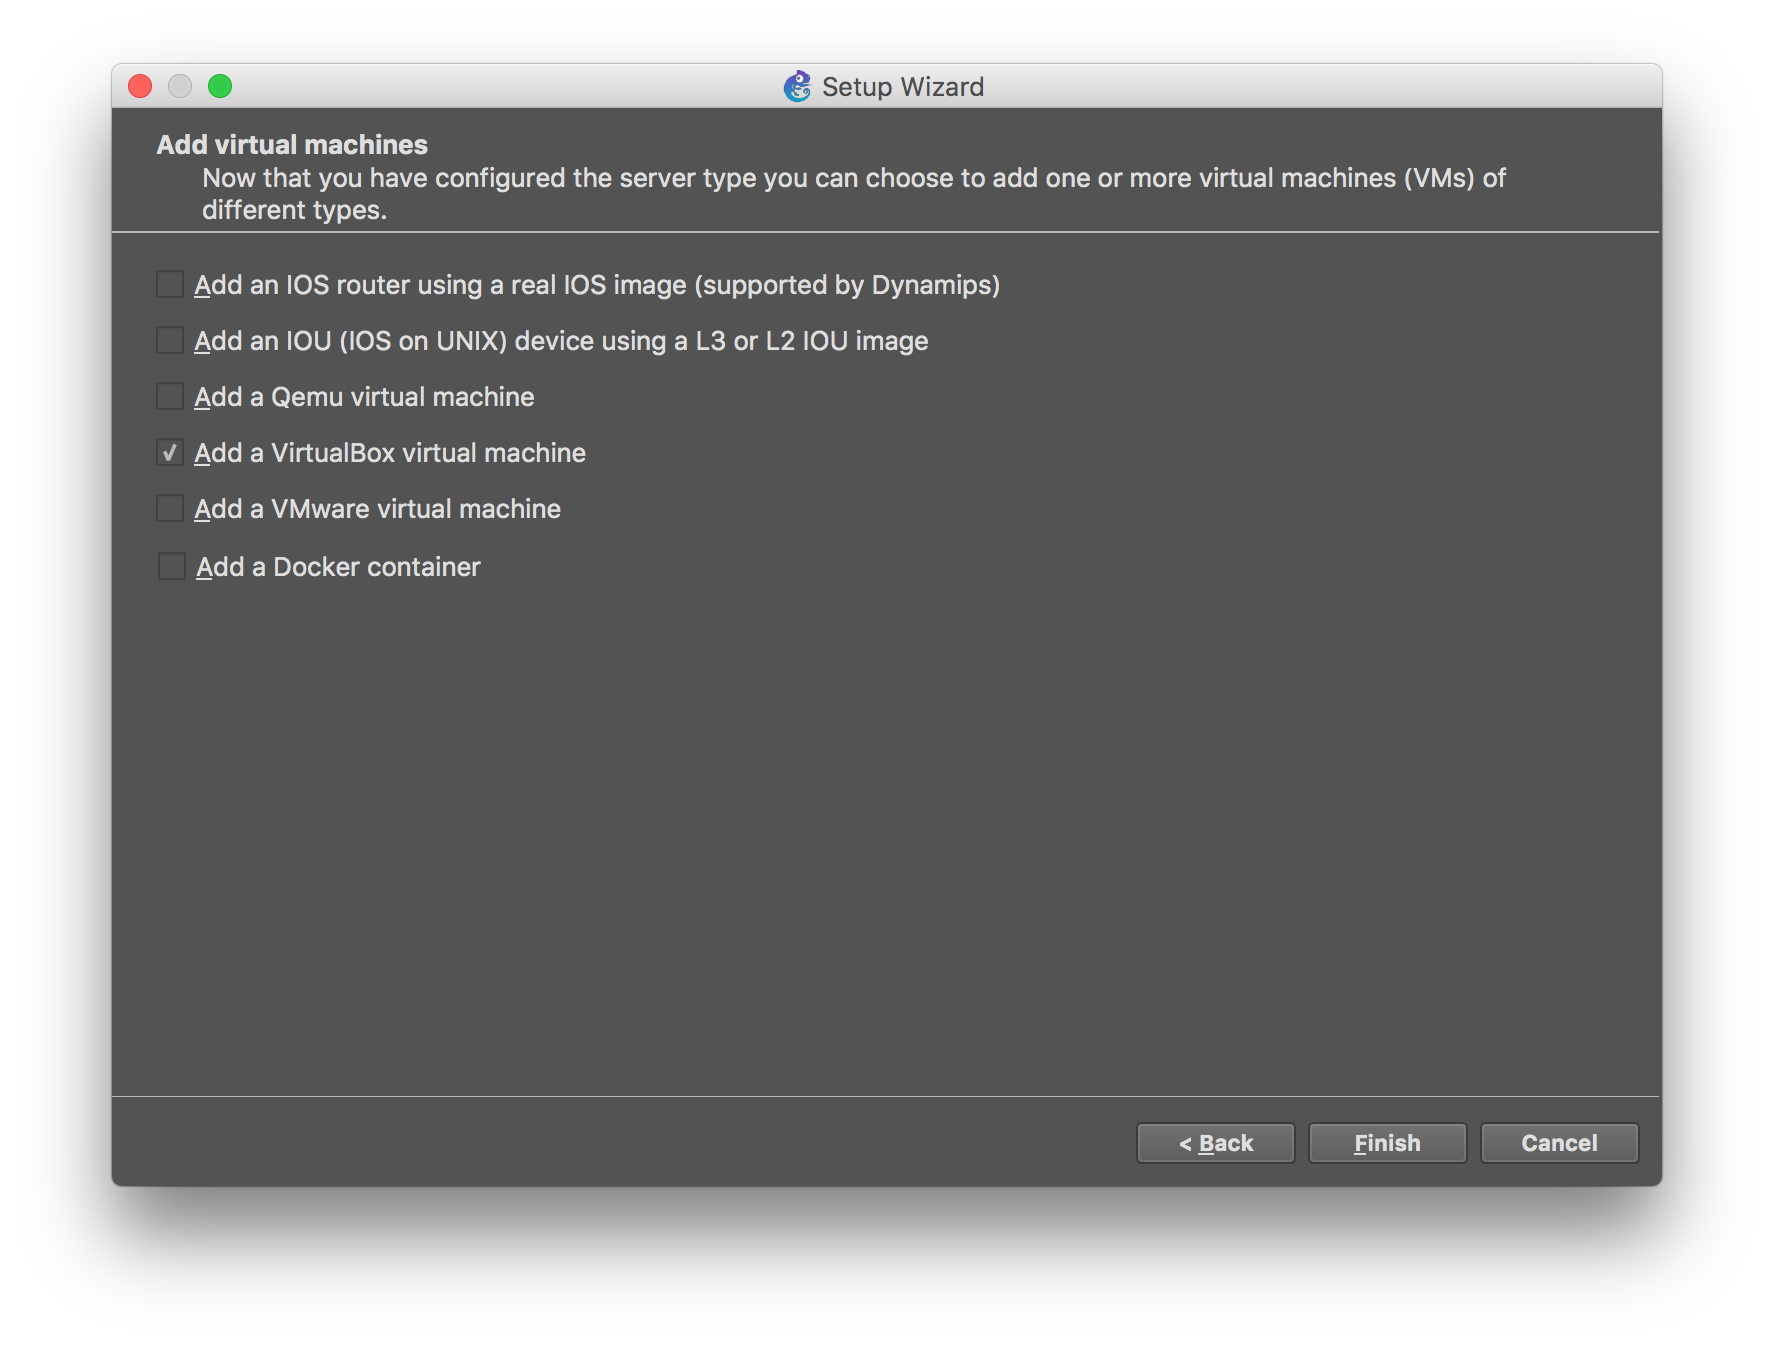
When you first start GNS3, it will start the Setup Wizard, and ask for a server. Select the ‘Local server’. We would not need the GNS3 VM for running the OpenSwitch appliance since will be run on top of VirtualBox.
On the next window select to ‘Add a VirtualBox virtual machine’ (at this point you should have already imported the OpenSwitch Appliance into VirtualBox for this to work).
Next, select the OpenSwitch Appliance Image that was imported into VirtualBox, and enable “Use as linked base VM”.
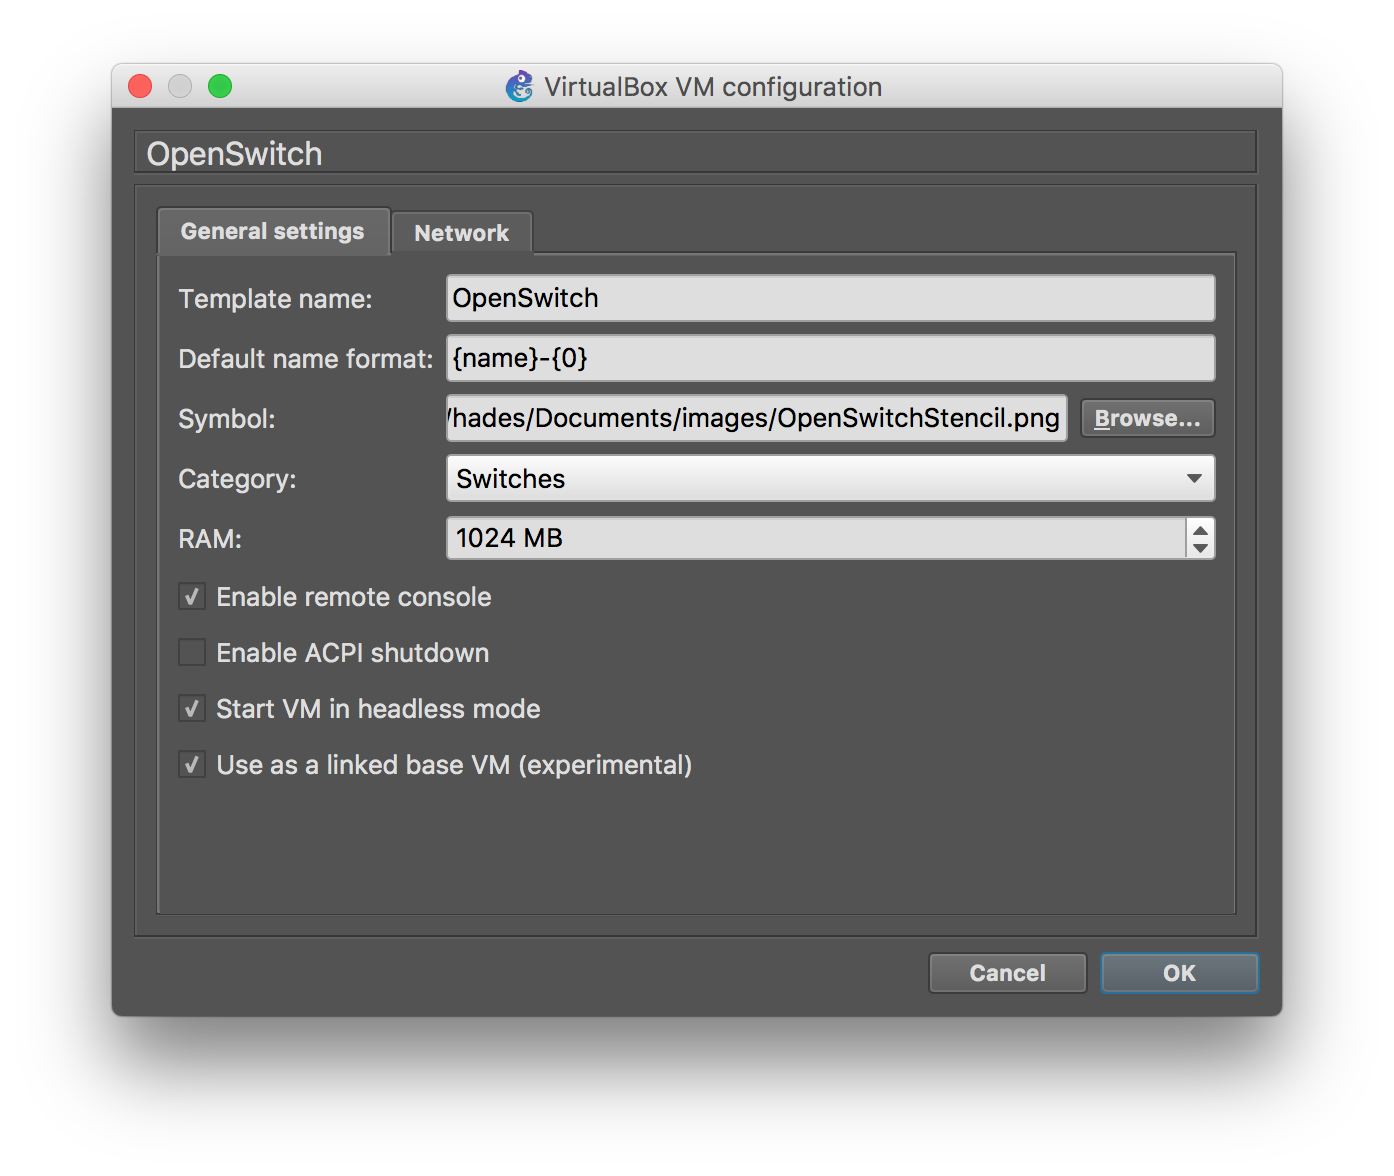
After of click on ‘Finish’, the preference panel for VirtualBox VMs will show and you will have to edit the recently created template to add some custom configuration:
On the ‘General Settings’ tab:
- Template Name: OpenSwitch-0.4.0 Appliance
- Default name format: {name}-{0}
- Symbol: /local/path/to/OpenSwitchStencil.png
- Category: Switches
- RAM: 1024 MB
- ☑︎ Enable remote console
- ☐ Enable ACPI shutdown
- ☑︎ Start VM in headless mode
- ☑︎ Use as a linked base VM
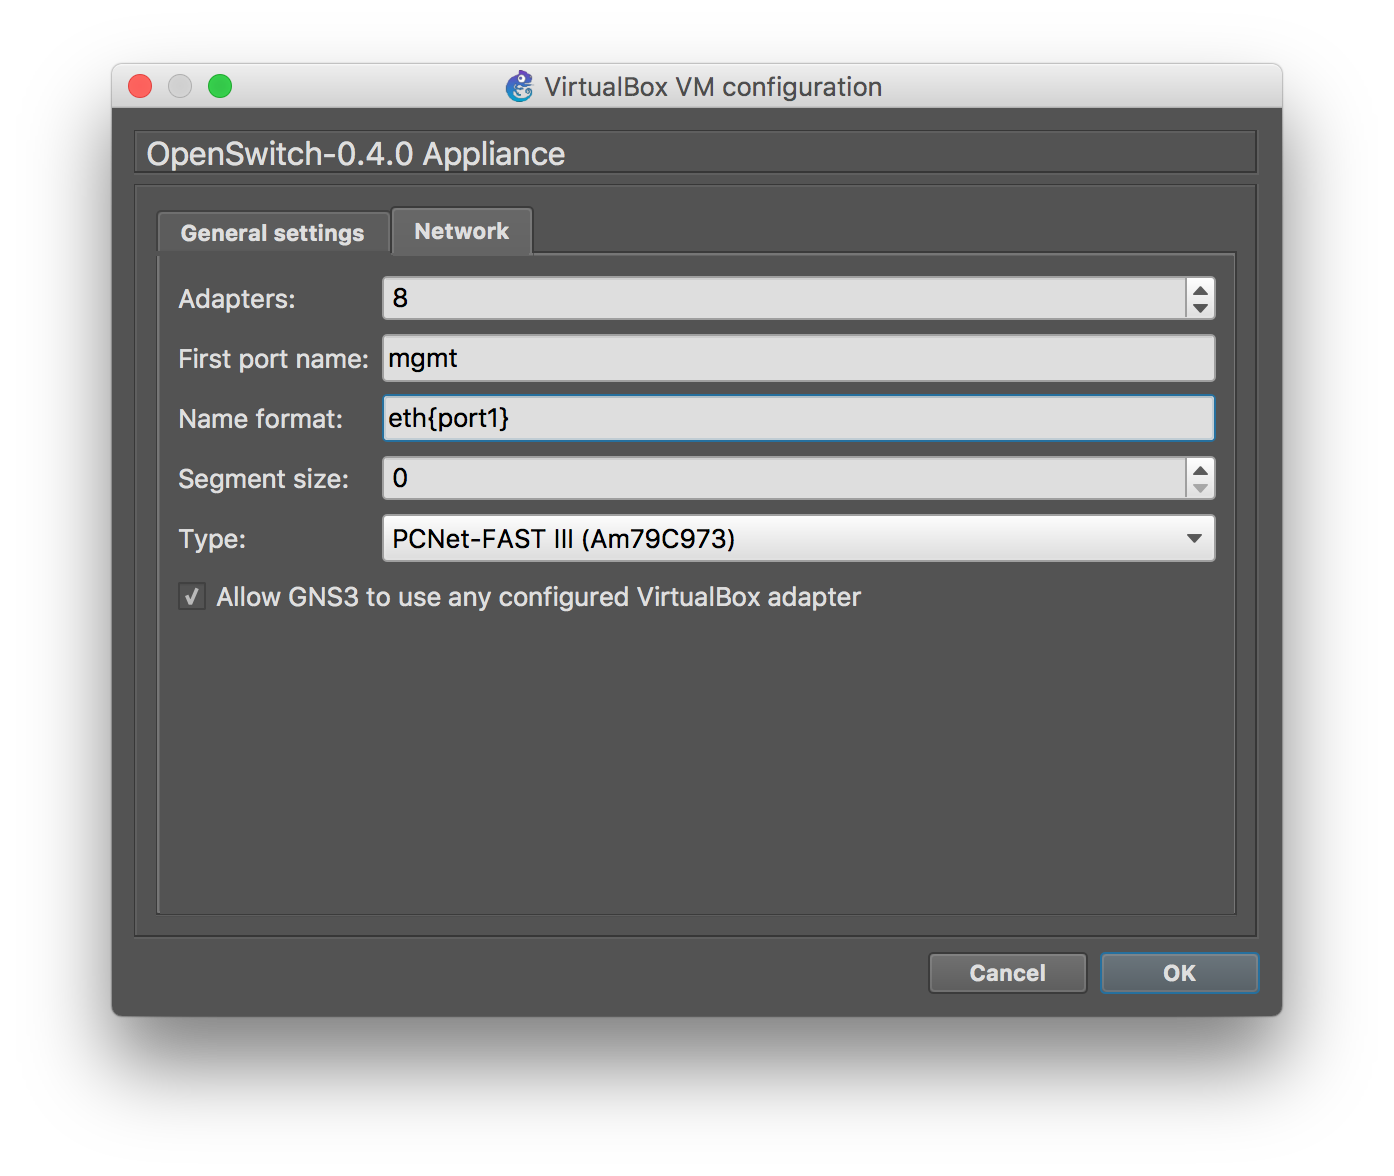
On the ‘Network’ tab:
- Adapters: 8
- First port name: mgmt
- Name format: eth{port1}
- Segment size: 0
- Type: PCNet-FAST III (Am79c973)
- ☑︎ Allow GNS3 to use any configured VirtualBox adapter
Creating A Simple Connection Between Two Appliance Instances
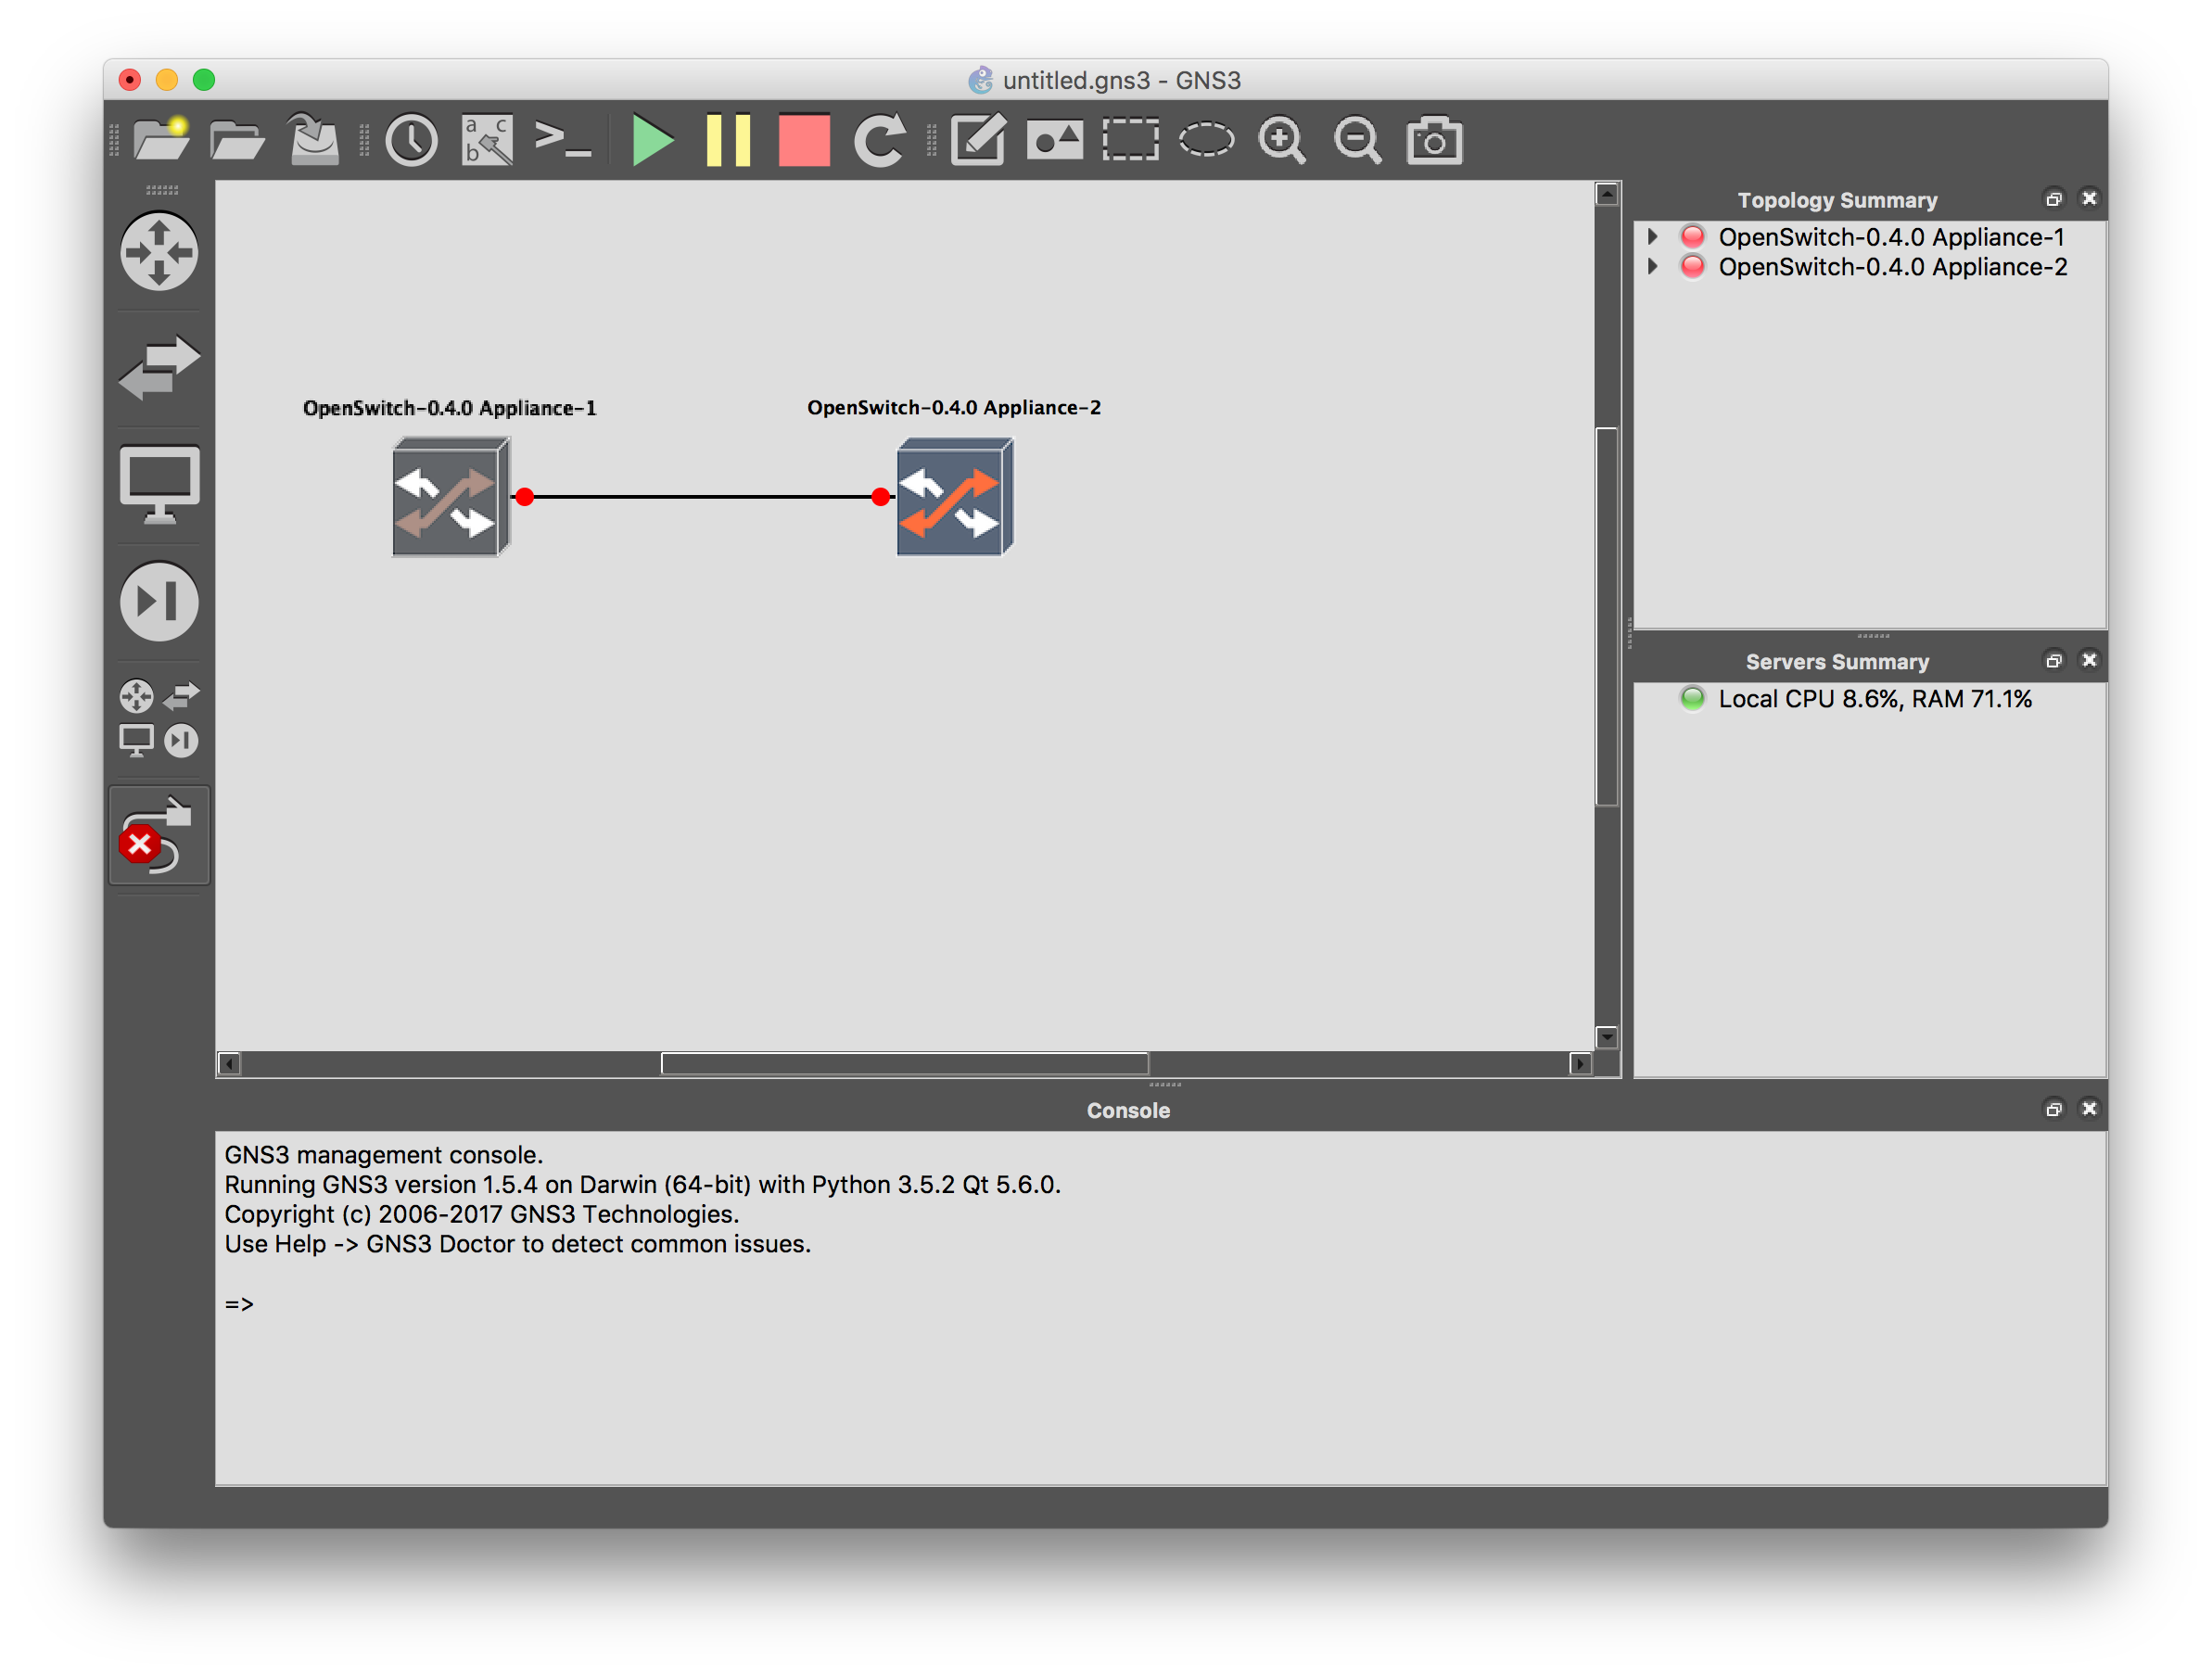
Now, it’s time to deploy two instances and verify connectivity between them:
- Create a new project and save it (the linked VM won’t work on temporal projects).
- Click on the ‘Browse all devices’ button on the left panel to show the available devices, then drag two OpenSwitch instances into the canvas (you can see in your VirtualBox UI that two new virtual machines are created).
- Use the ‘Add link’ tool from the left panel (the one that looks like a cable with an RJ45 plug) to connect the two instances over the eth1 port of both.
At the end of this setup your project should look like this:
Before starting the simulation, I will attach wireshark to one of the interfaces to see the packets between the machines:
- Right click on one of side of the links and select ‘Start capture’. This will create a pipe that will output the contents into a pcap file that wireshark can feed from. This can only be done when the link is down, so you need to start the captures before turning on the VM.
Now you can start your machines by hitting the top ‘Play’ button. This will start both VMs. Then you can double click on both machines and a Terminal will open where you get access to the serial console of the machine. You can login with the user ‘netop’ and password ‘netop’ (this will enter into the traditional CLI mode, but you can also login as root into a bash shell):
At this point you can right click on the link where we are capturing the traffic, and select ‘Start Wireshark’. This will open a WireShark window that is feeding from the pcap capture of the traffic from the port.
Now is time to see some traffic flowing between the machines: let’s enable LLDP on both ports, and we should be able to see both switches identifying each other, and the traffic flowing thru Wireshark. Let’s issue the following commands on the CLI of both switches:
switch# config
switch(config)# interface eth1
switch(config-if)# no shutdown
switch(config-if)# exit
switch(config)# lldp enable
switch(config)# exit
After these commands are entered on both switches, we can now show the LLDP neighbor information on any of the switches:
switch# show lldp neighbor-info eth1
Port                           : eth1
Neighbor entries               : 1
Neighbor entries deleted       : 0
Neighbor entries dropped       : 0
Neighbor entries age-out       : 0
Neighbor Chassis-Name          : switch
Neighbor Chassis-Description   : OpenSwitch 0.4.0 (epazote) Linux 3.14.19-yocto-standard #1 SMP PREEMPT Tue Sep 13 18:54:49 UTC 2016 x86_64
Neighbor Chassis-ID            : 70:72:cf:72:e1:dc
Neighbor Management-Address    : 10.0.2.15
Chassis Capabilities Available : Bridge, Router
Chassis Capabilities Enabled   : Bridge, Router
Neighbor Port-ID               : eth1
Neighbor Port-Description      : eth1
Neighbor Port VLAN Id          : 0
TTL                            : 120
switch#
Leave a Reply